

How To Use Fogging Oil On Outboard Motor
Winterizing Your Outboard Motor
Protect your outboard against freeze impairment. This article covers the materials you need and the procedure to get the task done.
By Brian Gordon, Terminal updated: 3/12/2021

By Brian Gordon, Last updated: three/12/2021
As the canoeing flavour draws to a close and Jack Frost begins his trek south, boaters plough to the job of laying up their boats for the winter. This article covers how to protect an outboard motor against corrosion and freeze-related damage during winter storage. The process, referred to as "winterization", consists of some simple tasks that are easily performed past about owners of an outboard-powered boat. These tasks include:
- Drain the crankcase oil (Four-stroke motors)
- Install a new oil filter (Four-stroke motors)
- Filling the crankcase with new oil (4-stroke motors)
- Changing the lower unit gear oil
- Stabilizing the fuel
- Flushing the outboard with antifreeze
- Fogging the cylinders
- Greasing the tilt tube and the pivot tube
- Protecting against corrosion
To reach these tasks, y'all will need the following items:
- Gallon of antifreeze
- Engine winterizing kit
- Flushing muffs
- Fuel stabilizer
- Gear lube oil
- Gear lube pump
- Outboard motor oil (Four-stroke motors)
- Oil filter (Four-stroke motors)
- Oil filter wrench (Sometimes needed)
- Bleed pan to grab motor oil or gear lube oil
- Absorbent "shop" rags
- Fogging oil
- Grease gun loaded with a cartridge of grease
- Corrosion inhibitor
Drain the crankcase oil. (Iv-stroke motors)
The reason y'all need to modify the oil is because contaminants in "dingy" oil tin can corrode and shorten the life of engine parts during wintertime storage. Before starting time the oil modify procedure, attach a set up of flushing muffs to a garden hose and place them squarely over both sides of the h2o intake for your motor. Then turn on the water, beginning the motor and allow it to run a few minutes to warm upwards the oil. So, plow off the motor and remove the flushing muffs.
Most iv-stroke outboards have an oil sump drain plug located below the crankcase at the back or side of the motor's leg. Unfortunately, changing outboard oil can be a bit messy. While some mechanics opt to remove the oil by sucking it out via the dipstick tube, this process does not become all the oil out. So we propose you follow the manufacturer'southward instructions for how to drain the oil and change the oil filter. (Note: Before removing the oil drain plug, be sure to position a catch pan under the motor to grab the oil as it drains out!)
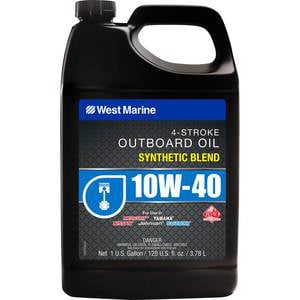
When shopping for outboard motor oil, make certain that the oil you select meets or exceeds the manufacturer'due south specifications in your possessor'southward transmission.
In some cases, the oil drain plug gasket may demand to exist replaced. Follow the manufacturer'southward recommendations in this regard. When finished, some cleanup volition be necessary—so make sure you accept some rags on hand.
Alter the oil filter. (4-stroke motors)
Later on draining the oil, remove the oil filter. About of these are of the spin-on type, similar to those on automobile engines. Sometimes, filters that have "taken a set" might crave an oil filter wrench for removal. The new filter should be an OEM or equivalent model. Earlier installing the new filter, lightly coat the O-ring on the filter with motor oil then spiral information technology on until information technology is hand tight.
Make full the crankcase with new oil. (Four-stroke motors)
After installing the new oil filter, fill the crankcase with new oil. Check your owner'south manual for the viscosity and quantity you need. Make sure the API service level meets or exceeds what the manual specifies also.
Change the fuel filter.
Now is a proficient time to change the OEM fuel filter located on the motor. Follow your possessor's manual in this regard.
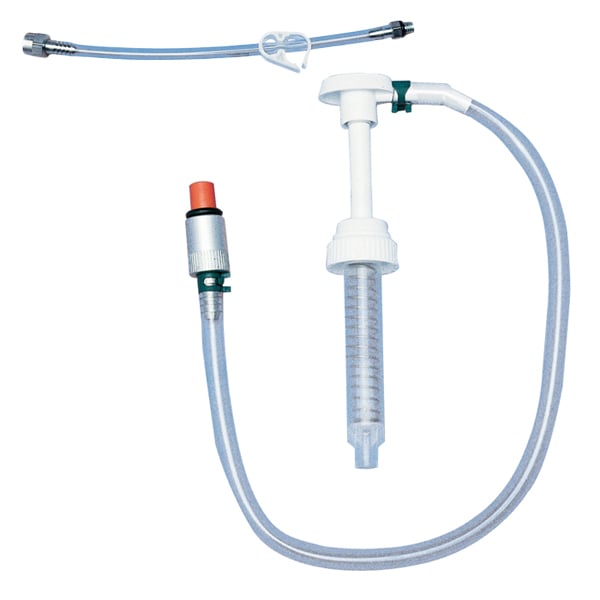
Example of a gear lube pump.
Modify the lower unit of measurement gear oil.
Earlier beginning, check your owner'due south manual for the viscosity and quantity of gear oil that your outboard requires. The gear box (located directly forrard of the prop) will take a stainless steel, screw-type drain plug at the bottom and a stainless steel screw-blazon vent plug somewhere above it. To start the process, place your catch pan nether the gear box and and then remove the lesser plug. Be careful to remove the gasket forth with the plug. (Note: Many bleed plugs include a magnetic prong to which some metal particles may be attached. Fine particles betoken normal gear wear, but coarse metal chips bespeak excessive habiliment. If in doubt, consult with a service professional person.) Once the lesser plug is removed, a small-scale corporeality of gear oil volition brainstorm to drip out. Next, remove the vent plug at the top. Once the top plug is removed, the gear oil should freely menses out the bottom drain hole. As the oil drains out, notice its color and clarity. Gear oil in good condition should be translucent with a greenish bandage, whereas a milky advent indicates that h2o has made its mode into gear box. If this is the example, seek the communication of a service professional.
New gear oil is always pumped upward from the lesser hole until it overflows at the acme. The reason it is filled from the lesser upwards is to eliminate the possibility of trapped air and ensure that the entire gear box casing fills with oil. In that location are two ways to pump in the oil. For very small outboards, 1 way is to press the nozzle of a tube of gear oil into the bottom pigsty and to slowly squeeze the gear oil into the casing until information technology overflows out the top hole. For larger outboards, the other way is to use a gear oil pump. In either example, when the oil overflows out the top pigsty, replace the peak plug, then remove the pump nozzle from the drain hole and quickly replace the plug. Make sure you don't forget the gaskets!
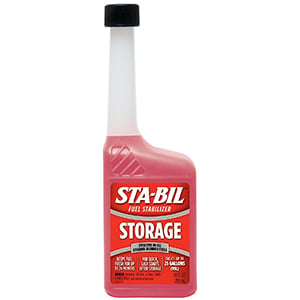
Gasoline fuel stabilizers help to forbid the formation of gum and varnish buildup and protect metallic surfaces from corrosion during winter layup.
Stabilize the fuel.
Stabilizing the fuel with products such as Star brite's STA-BIL or Biobor'southward EB Ethanol Treatment for Gasoline volition help to prevent the formation of gum and varnish that can form during winter storage. Follow the manufacturer's instructions for mixing 1 of these products at the correct ratio into your outboard motor's fuel tank. Next, you need to circulate the stabilized fuel through the entire fuel arrangement. To practice this, reattach the flushing muffs, turn on the h2o, restart the motor and let it to run for five to 10 minutes and then shut it off.
Fog the cylinders while flushing the motor with antifreeze.
To forestall freeze harm, prior to winter storage, many owners simply drain the cooling water out of their outboards. Yet, while it might seem like "overkill", we recommend flushing your motor with antifreeze. This will prevent remainder water from turning into ice and causing damage during a hard freeze. Dosing your motors cylinders with fogging oil prior to wintertime storage will prevent the germination of rust within the cylinders—which obviously is a skilful thing!
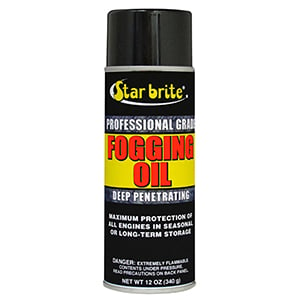
Engine fogging oils are typically offered as an easy-to-use spray.
Fogging the cylinders and flushing your outboard with antifreeze can be combined into a single procedure. For 2- and four-stroke carbureted motors, after running the motor for 5 to ten minutes (per the educational activity above), shut off the motor, disconnect the garden hose and hook upward the winterizing kit to the flushing muffs. And then fill the winterizing kit's tank with antifreeze, which should be of the not-toxic propylene glycol diverseness. (For more about antifreeze, see Antifreeze 101![]() ). Next, remove the cowling to gain access to the air intakes on the front of the engine. (Note: Certain tardily model outboards have a maintenance valve to which products such as CRC'southward Engine Stor® Fogging Oil fit via an adapter. Bank check your owner'due south manual in this regard.) Side by side, after opening the valve to the winterizing kit, restart the motor and watch the antifreeze level drop in the tank. You should brainstorm to see antifreeze discharging via the "telltale" of water that exits the motor.
). Next, remove the cowling to gain access to the air intakes on the front of the engine. (Note: Certain tardily model outboards have a maintenance valve to which products such as CRC'southward Engine Stor® Fogging Oil fit via an adapter. Bank check your owner'due south manual in this regard.) Side by side, after opening the valve to the winterizing kit, restart the motor and watch the antifreeze level drop in the tank. You should brainstorm to see antifreeze discharging via the "telltale" of water that exits the motor.
While the engine is running, brainstorm to spray fogging oil into the carburetor(s). This will normally crusade lower-horsepower engines to stall, while higher horsepower engines may cough and sputter, only continue running while emitting white smoke. Spray a adept amount of fogging oil through the intake and so disconnect the fuel line from the engine, and continue spraying fogging oil into the engine until the engine dies. Unremarkably the motor will run rough and emit white smoke just before information technology dies. Running the motor until it burns upwardly all of the fuel from the carburetors prevents the formation of varnish deposits from gasoline that would otherwise remain in the carburetor bowl during winter storage.
Fogging Procedure for Outboards with Electronic Fuel Ignition
Just similar with the procedure described above, y'all tin fog your EFI motor and at the aforementioned time winterize its cooling system with antifreeze. However, the procedure for fogging an EFI-type motor is unlike—and likewise footling easier compared to carbureted motors. Instead of spraying fogging oil into the cylinders through the carburetor(southward) yous will need to run the fogging oil directly through the fuel organization. This is ordinarily done by running a fuel line from the motor to a minor container of stabilized gasoline into which fogging oil formulated for EFI motors has been mixed. Consult your owner's manual for the correct fogging oil to apply. (Important: Do non apply fogging oil formulated for carbureted motors, as it contains a wax-like substance that can clog the fuel injectors of an EFI motor!) Unlike the procedure for carbureted motors, you should non cutting off the fuel supply to the motor and so wait for it to cease. Instead, run the motor until you see white smoke exiting from the exhaust and and so, before the winterizing kit runs dry out, shut the motor off. (Annotation: Running an EFI motor until information technology quits due to a lack of fuel can damage the fuel organisation.)
Applying a corrosion inhibitor volition assistance prevent the formation of rust during winter layup.
Concluding Tasks
For oil-injected two-stroke motors, completely fill up the two-stroke oil tank and so that water won't condense within the tank and contaminate the oil supply. Locate the zerk fittings for the pivot tube and the tilt tube and with a grease gun clasp in some fresh grease. Next, spray a corrosion inhibitor on to the ability head and replace the cowl.
Finally, remove the propeller, inspect it for damage, and accept it repaired or replaced equally needed. Cheque the shaft for monofilament fishing line wrapped around it, which could impairment the seal. Lubricate the shaft with grease and reinstall the prop, or leave it off to discourage theft. Finally, store the engine in an upright position, so whatever water will drain out. Now you're done—and your outboard is set for hibernation

How To Use Fogging Oil On Outboard Motor,
Source: https://www.westmarine.com/west-advisor/Winterizing-Your-Outboard-Motor.html
Posted by: glessnersopland.blogspot.com
0 Response to "How To Use Fogging Oil On Outboard Motor"
Post a Comment